| Templot Companion | search | remove search highlighting |
This page is about using the make transition and the extend/shorten functions to create a neat linking track between two existing templates.
For a simpler form of link track suitable for yards and sidings, see make simple link.
For more explanation about the difference between these functions, see: link existing templates.
For more about transition curves, see transition curves.
1.

Here we have a station throat being designed. We need to create a link track between the turnout at A and the running line at B. The approach track on the turnout at B has been split off and stored as a dummy template to be used in the process.
2.
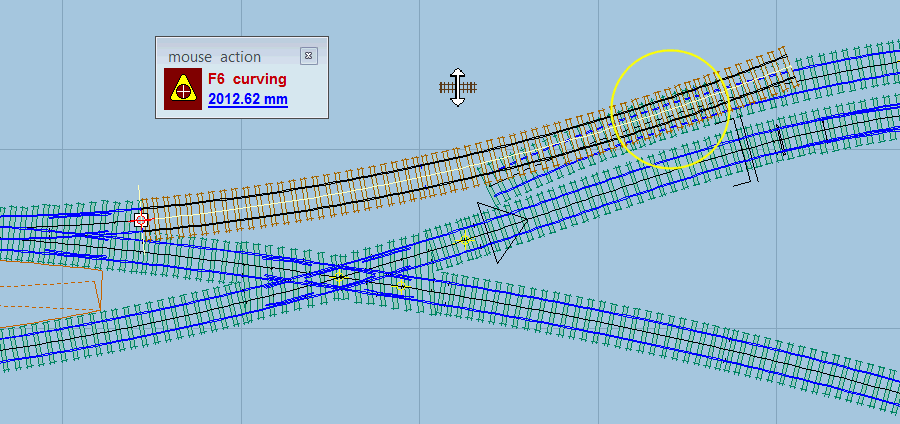
First a branch track is added from the turnout, using tools > make branch track menu item.
To avoid a sudden reverse curve, the link track will need to be an S-curve transition. This branch track will become the other dummy template to be used in creating such a curve. The radius is therefore adjusted using the F6 mouse action to provide a suitable offset between the two curves.
3.
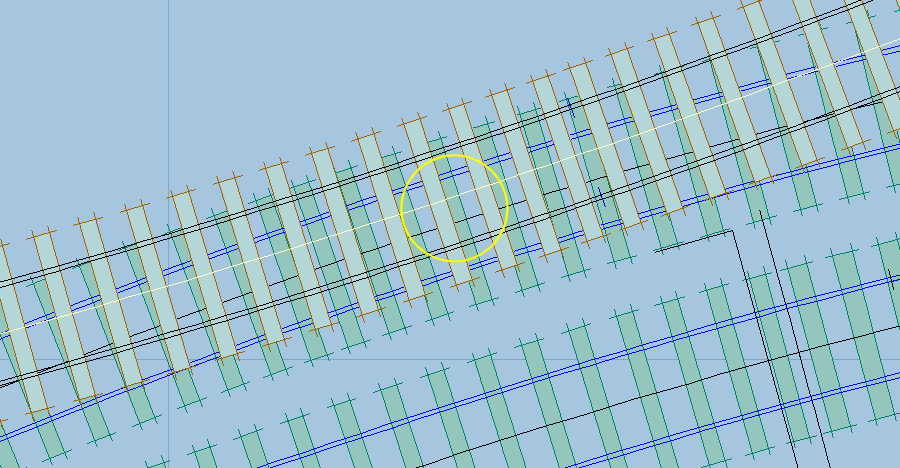
In order to create a transition curve, the two track centre-lines must come close together, but they must not intersect (cross over).
The size of the offset gap between them will determine the length of the resulting transition zone - widening the offset lengthens the transition zone. Setting a suitable offset is something which comes with experience, and often some trial and error is needed. In most cases we want a long gentle transition rather than a short abrupt one. But it can't be too long because it must fit between the two end positions (at A and B above). An offset of about a quarter of the track gauge is usually a good starting point.
4.
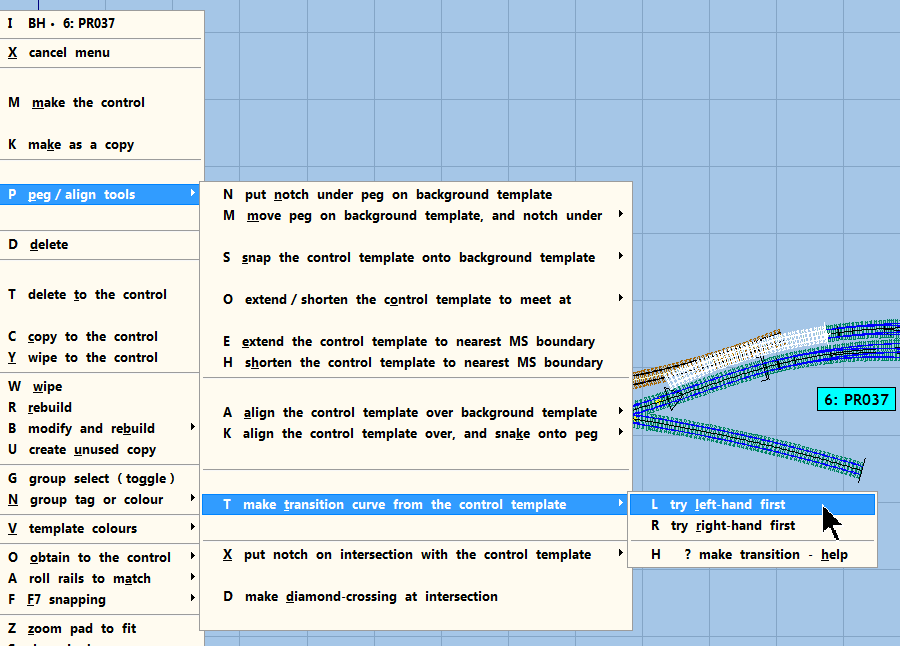
The make transition function requires that one of the originating templates is a background template, and the other is the control template. So now to create the transition curve between them, click on the background template, and then click this menu item (or just press P - T - L on the keyboard).
5.
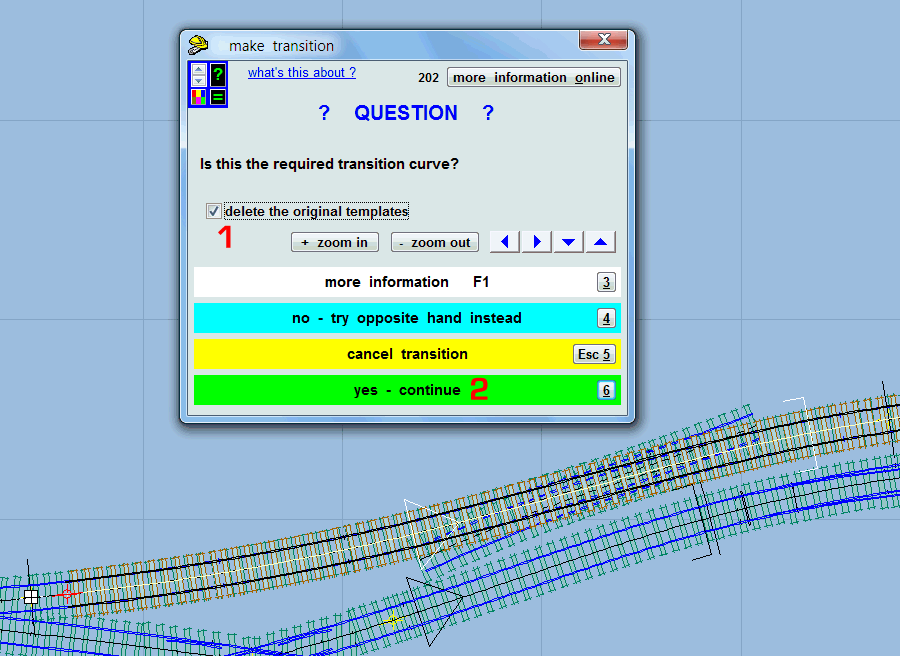
A transition curve has been created, and we need to decide whether it is acceptable.
![]() This dialog is modal (i.e. nothing more can happen in Templot until we respond to it), so if you need to zoom out on the trackpad or pan across in order to see the full transition curve template, it is necessary to use the buttons on the dialog, and not the usual trackpad controls.
This dialog is modal (i.e. nothing more can happen in Templot until we respond to it), so if you need to zoom out on the trackpad or pan across in order to see the full transition curve template, it is necessary to use the buttons on the dialog, and not the usual trackpad controls.
This transition is the required hand, so there is no need to try the opposite hand. And the length of the transition zone fits easily within the available space. It could perhaps have been a fraction longer, but not by much because there are only about 6 sleepers on the right between the end of the transition zone and the toe of the turnout. Running a transition zone into or through a turnout template is not prototypical and best avoided, although sometimes unavoidable in cramped spaces.
So having decided that this transition zone is acceptable, we no longer need the original dummy templates and we can tick the box at (1) to have them deleted. Then click the green yes - continue bar at (2) to accept the transition curve template.
Had the transition not been acceptable, we could click the yellow cancel transition bar, and revert to making adjustments to one or both of the original templates before trying again.
6.
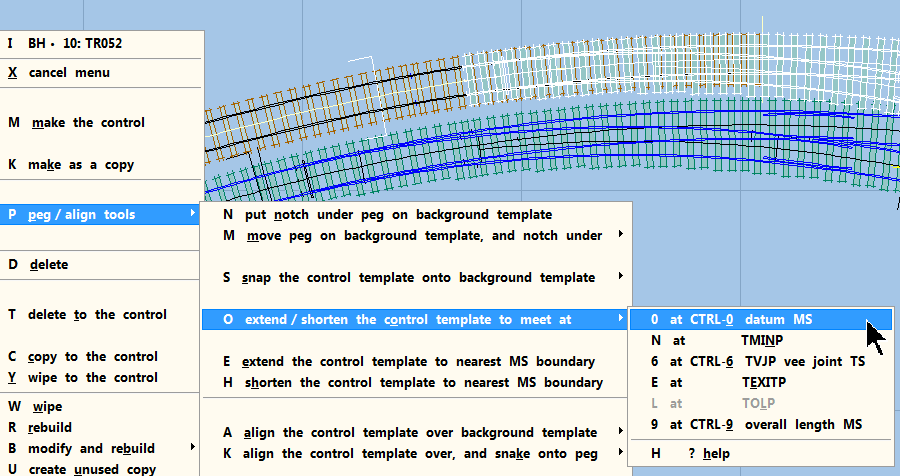
Templot has created the transition zone in the right place to match the original curves, but it doesn't yet know where we want the new template containing the transition to begin and end. Therefore at this stage it has simply added a 1 chain (66ft scale) length beyond the transition zone at each end.
Now to tell Templot where the template ends we use the extend/shorten to meet functions. The template length will then be adjusted to fit to the specified template boundary. Here at this end of the new track the template is clearly too long, overlapping the background turnout beyond its CTRL-0 datum position at the toe. So click on the background template, and then click this menu item (or just press P - O - 0 on the keyboard).
7.

The template is shortened to fit at the specified boundary exactly.
8.
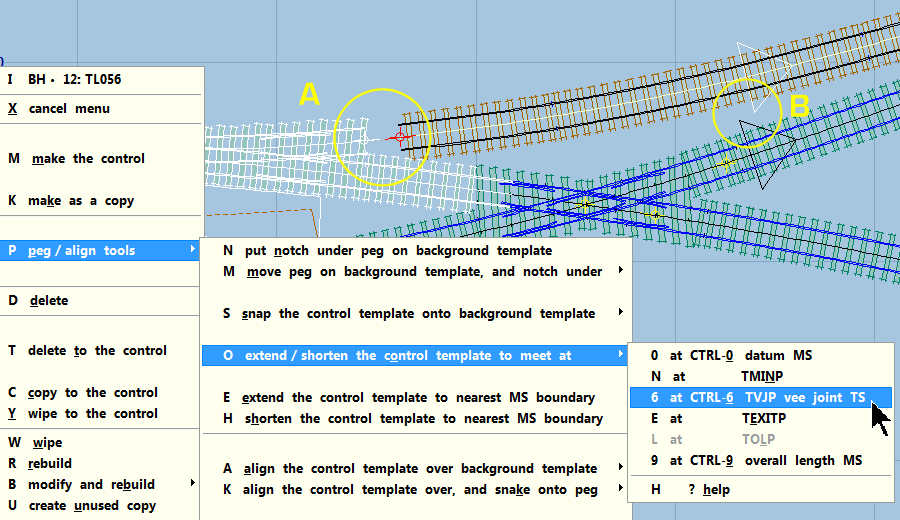
Now to repeat the process at the other end of the new track. Here the template is too short and needs to be extended. This time the required boundary is on the turnout exit side, at the CTRL-6 TVJP vee joint position. So click on the background template at A, and then click this menu item (or just press P - O - 6 on the keyboard).
![]() Unlike most Templot functions, the red fixing peg takes no part in this operation and can be ignored.
Unlike most Templot functions, the red fixing peg takes no part in this operation and can be ignored.
![]() It's important to understand that the template is being extended in length, not shifted into position which would disrupt the alignment at the other end of the template - note the relative positions of the transition markers at B.
It's important to understand that the template is being extended in length, not shifted into position which would disrupt the alignment at the other end of the template - note the relative positions of the transition markers at B.
9.

This is the result. The new template has been extended to fit and the transition zone has not been disturbed - note again that the relative positions of the transition markers are unchanged.
10.

The end result is a new template linking the existing templates, and following a smooth S-curve transition between them. All that remains is to store it (press the INSERT key, or click the top ![]() button).
button).
11.


Attractive flowing curves as the design continues.
link to this page: https://c7514493.myzen.co.uk/dokuwiki/doku.php?id=make_transition_link